REAL-WORLD GUNSMITHING

Gunsmithing Solutions

A collection of real repairs, upgrades, and solutions Dave has performed — from sight installations and trigger jobs to catastrophic damage repairs. Every job tells a story.

Installing Sights on a Walther PPQ

Installing Sights on a Walther PPQ

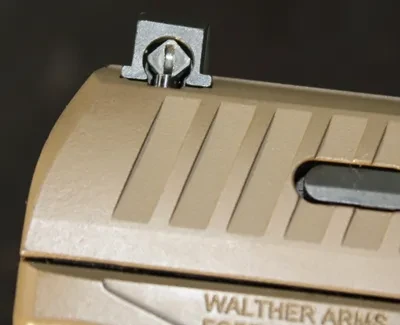
Unlike most modern pistols that use friction to hold the rear sight in place, the Walther PPQ uses a spring-loaded cylinder and square screw. The screw fits into a slot on top of the cylinder which retains the rear sight in place. On most pistols you need a sight pusher to adjust or remove the rear sight. On the Walther PPQ, adjust windage by turning the screw while keeping it in the slot. To remove the rear sight, use a narrow screwdriver and push the cylinder down — you can then push the sight out with just your thumb. Walther has come up with a very unique system which works but is fairly flimsy. Dave upgraded his to Trijicon WP01 steel night sights.

Beretta PX4 Accidental Discharge — Safety Repair

Beretta PX4 Accidental Discharge — Safety Repair

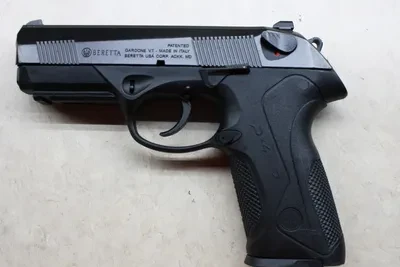
A customer reported that when he depressed the de-cocker lever on his Beretta PX4 pistol, it went off. Fortunately, nobody was hurt, but with the PX4 internal safeties, this never should have happened. He brought it to me for repair. When I disassembled the gun, I found the trigger assembly had been modified and the safety lever had its spring loaded ball-bearing removed.

The Beretta PX4 has two internal safety systems which should have prevented this discharge. First is the "safety de-cocker" lever which contains the "firing pin plunger." When the hammer is released, it falls forward and hits the "firing pin plunger." The firing pin plunger is accelerated forward hitting the firing pin which discharges the ammo in the barrel firing chamber. When this "safety de-cocker" lever is rotated down to de-cock the weapon, it rolls forward taking the "firing pin plunger" off line and blocks the hammer making it impossible for a round to go off.

The second internal safety is the firing pin block. This block physically prevents the firing pin from going forward and igniting the round in the firing chamber. This block is spring loaded and can only be moved out of the way when the trigger is pulled.

Under normal conditions with both of these safeties in place, this gun should not fire when the de-cocker lever is activated.

To prevent this from happening again, I upgraded and replaced the "safety de-cocker" with a factory Beretta "de-cocker G safety". I also replaced the de-cocker spring to assure reliable functioning.

To prevent the "firing pin block safety" problem, I replaced its spring and both cleaned and lubricated it to assure reliable functioning.

When test firing at the range, I tested each of these systems independently. First, I deactivated the "firing pin block safety" by keeping the trigger pulled when de-cocking the gun. I did this 50 times and the gun didn't go off. Second, I de-cocked the gun at least 50 times with the "firing pin block safety" activated. The gun did not fire. I'm reasonably certain this malfunction will not happen again.

With a Beretta PX4, it's important to de-cock this gun only with the de-cocking lever. Don't lower the hammer manually with your thumb. If you use your thumb, you have to pull the trigger thus deactivating the "firing pin block." You have also failed to rotate the "safety de-cocker" blocking the hammer and taking the "firing pin plunger" off line. If your thumb were to accidently slip off the hammer, the gun could go off. This is an unsafe practice, especially with a gun that has these automatic safety systems built into the gun. To this day, I still don't know why this gun went off accidently, but fortunately the owner was pointing it in a safe direction and nobody was hurt as a result.
AR-15 Flash Suppressor Removal

AR-15 Flash Suppressor Removal

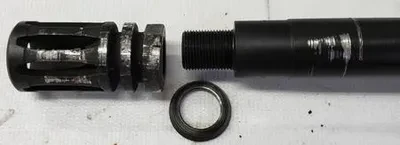
Some AR-15 flash suppressors can be really tight. Using the right tools makes all the difference. Dave tapes the barrel and clamps it in wood, then uses a heat gun (not flame) on the threads to break the suppressor loose — no damage to the barrel or threads.

Remington 870 Action Binding Fix

Remington 870 Action Binding Fix

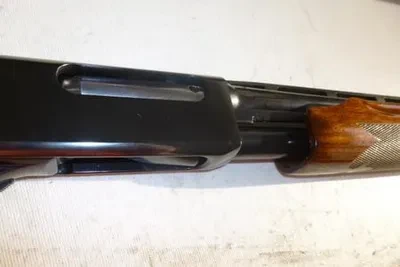
Is the action on your Remington 870 pump shotgun binding or getting hard to work? Most likely you need to 'tune' the action bars so they align with the receiver. It could also be that one or both receiver feed latches have worked loose and need to be re-staked. These issues are all addressed in a simple armorer cleaning & service for $85.00. Dave is factory certified by Remington for this and other repairs. He also works on Model 1100 & 11-87s.

GLOCK Parts & Armorer Service

GLOCK Parts & Armorer Service

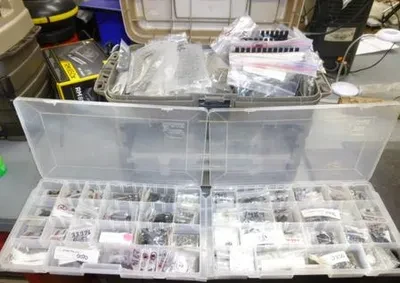
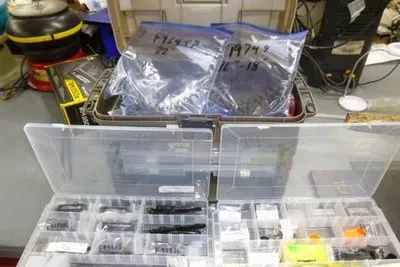
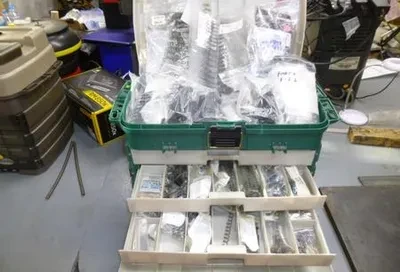
Dave is factory trained and certified by GLOCK, Inc. He maintains most parts for Gen-1, Gen-2 & Gen-3 GLOCKs as well as many for Gen-4 & Gen-5 models, including magazine springs. This means he can typically fix your GLOCK in a week without waiting on shipping. If you need Gen-6 parts, Dave can order them directly from Glock for you.

Remington Shotgun Parts & Service

Remington Shotgun Parts & Service

Dave is factory trained and certified by Remington Arms to work on the Model 870, 1100, and 11-87. He maintains most parts for the 870 plus many for the 1100 & 11-87, so he can typically fix your shotgun in a week.

AR-15 & Ruger Rifle Training

AR-15 & Ruger Rifle Training

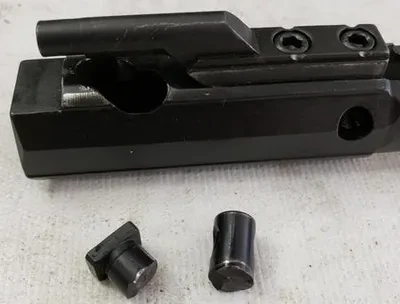
Imagine the force it takes to break the cam pin of an AR-15 bolt — hardened steel, and tough. Dave didn't start building AR systems until he'd been to school three times. He is factory trained in the AR-15 system through Colt, Ruger, and AGI, and is factory certified on the Ruger Mini-14/30 carbines and AR-556 rifles. He also works on Ruger MK-I/II/III and 22/45 pistols.

SIG Sauer P-Series Parts & Service

SIG Sauer P-Series Parts & Service

Dave is factory trained and certified by SIG SAUER, Inc. to work on their P-Series pistols (P220, 225, 226, 228, 229, 230, 232, 238, 239, 938, 2202, SigPro, 320 & 365). He maintains most P-Series parts and magazine springs, so he can typically fix your SIG in a week.

Deep Cleaning & Annual Service

Deep Cleaning & Annual Service

Disassembling a gun can reveal all kinds of surprises — dirt, grime, carbon, leaves, and mixed lubricants that form a sticky film and cause malfunctions. Dave once had to soak a SIG P226 in solvent just to remove the firing pin. On guns you shoot a lot, a complete disassembly and cleaning every year or every 3,500 rounds is a good idea. Dave performs this service for $85 on most pistols, shotguns and rifles.

Ruger Mini-14/30 Flat Top Rail System

Ruger Mini-14/30 Flat Top Rail System

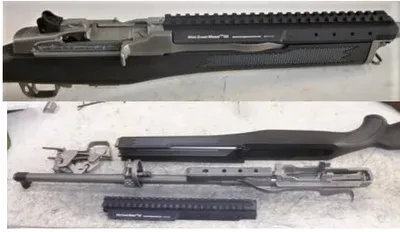
The Ruger Mini-14 & 30 have always had a weak scope mounting system. With the Amega Ranges flat top rail system, you can mount a scope, red dot, flashlight, or laser on a rock-solid mount.

Ruger .22 Pistol Speed Strip Kit

Ruger .22 Pistol Speed Strip Kit

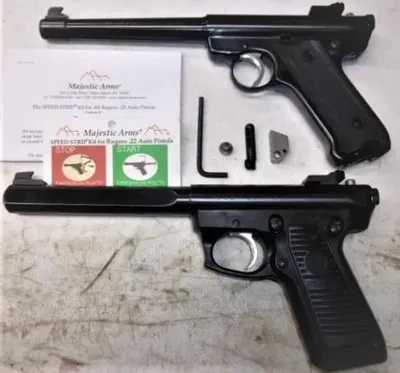
All Ruger .22 pistols (MK-I/II/III and 22/45) are notoriously hard to disassemble and clean. The Majestic Arms Speed Strip Kit solves this — after installation, just remove the top bolt with a hex wrench and pull the bolt without full disassembly. Dave charges a flat $85.00 labor fee for installation and can order the correct kit for your model.

Ruger Mini-14 MO-ROD Barrel Stabilizer

Ruger Mini-14 MO-ROD Barrel Stabilizer

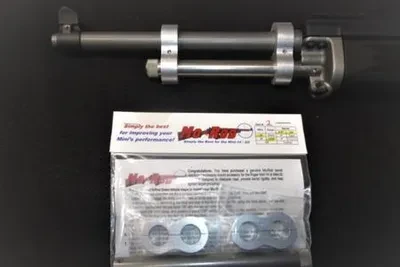
The Ruger Mini-14 & 30 are excellent carbines, but accuracy has never been their strong suit. The MO-ROD barrel stabilizer by Sunflower Outdoor Sports uses two clamps and a solid aluminum rod to stabilize the barrel and absorb excess heat, helping achieve sub-MOA performance. Dave can order and install this unit on your Mini-14 or Mini-30.

1911 EGW Ambi Thumb Safety Installation

1911 EGW Ambi Thumb Safety Installation

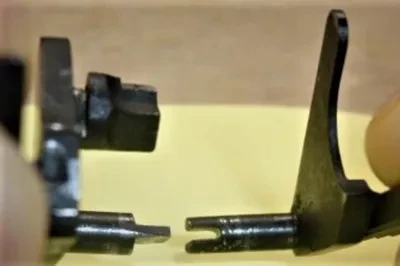
The typical 1911 ambi thumb safety uses a tongue & groove setup to link the two parts — it works, but it's weak. EGW's improved design adds a tube over the link and anchors the right thumb safety with a sliding edge fitted into a grooved hammer pin. Like all 1911 thumb safeties, this one must be fitted, but it's much stronger and engineered to last.

SIG P-Series Trigger Job with Grayguns Kit

SIG P-Series Trigger Job with Grayguns Kit

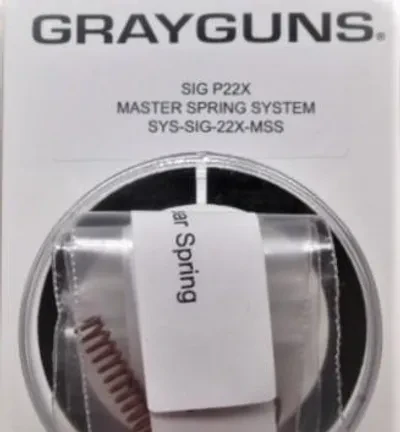
The P-Series SIG double-action trigger pull is typically around 10 lbs. The Grayguns kit with reduced-power hammer and sear springs brings it down to about 8.5 lbs while keeping the gun reliable. Dave uses the Grayguns kit and then goes one step further by polishing key areas in the action for a smooth, consistent pull.

S&W Model 59 Rust Restoration

S&W Model 59 Rust Restoration

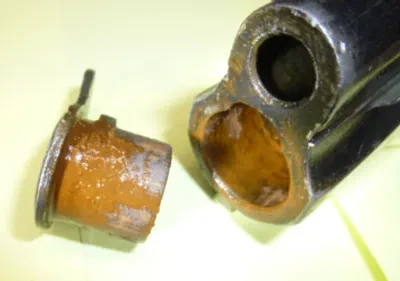
Dave had to soak a classic S&W Model 59 slide in deep penetrating oil for 3 days before he could break the barrel bushing loose. No matter how bad the rust, Dave works to bring your firearm back to reliable, safe operation.

Breached Casing Damage Repair — SIG P220

Breached Casing Damage Repair — SIG P220

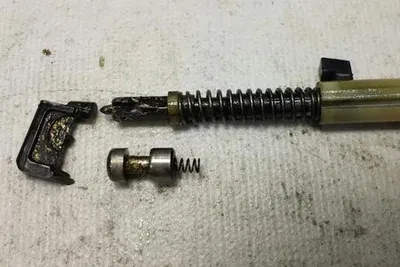
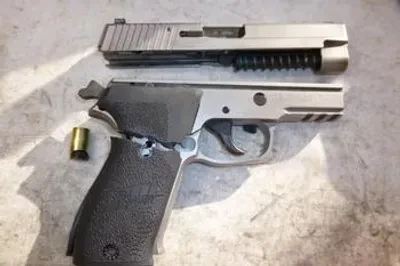
Cheap ammo and poorly constructed reloads can result in a breached casing where high-pressure gas is released into the gun while firing. In this case, a SIG P220 .45 caliber pistol suffered severe damage — steel parts bent, plastic parts broken. Replacement parts alone cost $300.00. The price of quality manufactured ammo is well worth it, especially when your health is on the line.

Ruger Mini-14 Damage

Ruger Mini-14 Damage

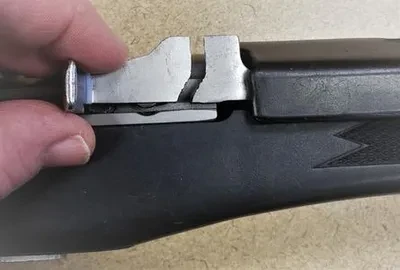
As strong and well made as Ruger Mini-14 parts are, they can still break from rough treatment or thousands of rounds fired. This charging handle on the slide assembly of a Mini-14 broke after tens of thousands of rounds were fired through at a sheriff training range.

Have a Problem That Needs Solving?

Call Dave after 12:00 Noon PST to describe your firearm issue. Chances are he's seen it before — and fixed it.